
DIY Segmented Lashes: How to Map Your Own Custom Look Like a Pro
- ClaudiaISB

- Jan 31
- 4 min read

Ever marvelled at how some people have effortlessly fluttery lashes that look almost magical? The secret might just be segmented lash extensions. While mapping them yourself can sound intimidating, with a little guidance, you’ll be elevating your lash game like a pro — no salon appointment required.
If you’re ready to upgrade your look without the hassle or cost of frequent salon visits, this guide is for you. DIY segmented lashes allow you to customise your style completely, whether you love soft everyday elegance or bold, statement glamour.
Lash mapping isn’t just a beauty routine — it’s a form of self-expression. Whether you’re preparing for a special occasion or refining your everyday look, segmented lashes offer versatility, creativity, and confidence.
In this post, we’ll explore:
What segmented lashes are
Why lash mapping matters
How to map your own custom look step by step
Styling ideas for different eye shapes and occasions
What Are Segmented Lashes?

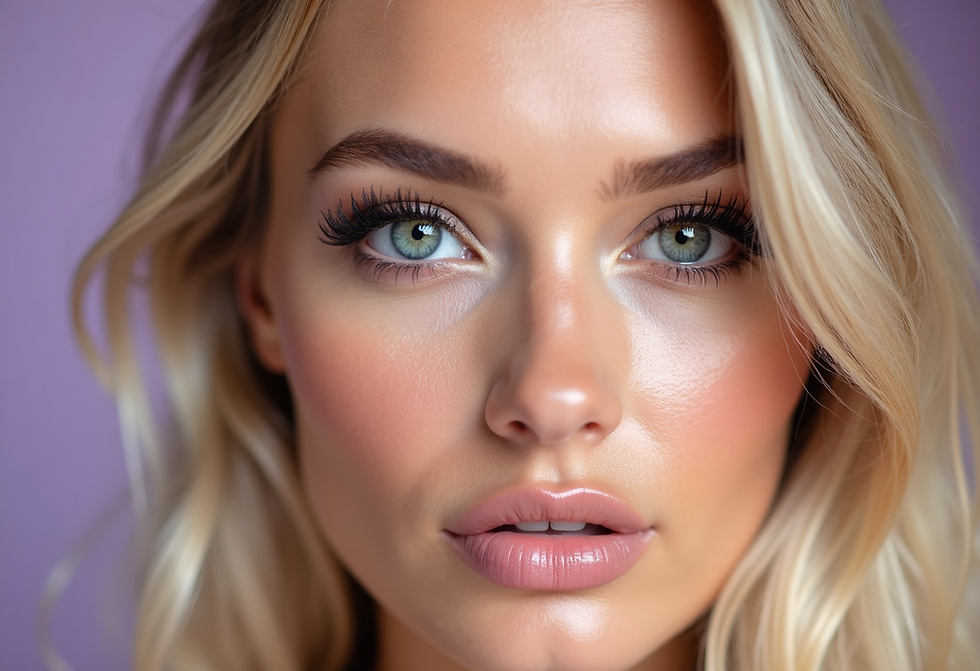
Segmented lash extensions are small clusters of lashes applied individually along your natural lash line. Unlike traditional strip lashes, segmented lashes offer a more natural, lightweight, and fully customisable result.
Each segment can vary in length, curl, and thickness, giving you endless styling possibilities. Think of them as accessories for your eyes — just like jewellery, you can mix, match, and personalise your look.
By learning how to map segmented lashes correctly, you ensure they enhance your natural eye shape and deliver the exact effect you want — from soft and subtle to bold and dramatic.
Why Map Your Lashes?
Lash mapping is the key to achieving a polished, professional-looking result.
Here’s why it matters:
Personalisation: Design a lash look that reflects your style rather than relying on one-size-fits-all strips.
Precision: Mapping guides exact placement, creating balance, symmetry, and a more lifted appearance.
The best part? You don’t need professional training. This DIY technique is approachable, enjoyable, and easy to incorporate into your beauty routine.
Tools You’ll Need

Before you begin, gather the following essentials:
Segmented Lashes
Choose a mix of lengths and styles. Shorter segments create a natural look, while longer ones add drama.
Lash Adhesive (Bond)
Use a high-quality bond that’s strong yet gentle for comfortable, long-lasting wear.
Precision Tweezers
Essential for accurate placement of each lash segment.
Sealant
Locks the lashes in place and removes any remaining tackiness.
Mirror
A magnifying mirror helps you see every detail clearly.
Once your tools are ready, you’re set to start mapping!
Step-by-Step: How to Map Your DIY Segmented Lashes
Step 1: Decide on Your Desired Look
Start by choosing your style — natural, wispy, doll-eye, or bold glam. This decision will guide all your mapping choices.
Step 2: Choose the Right Lengths
Lash length plays a major role in your final look:
Short lengths (8–10mm): Ideal for natural, everyday wear
Longer lengths (12–16mm): Perfect for evening looks or special events
Mixing lengths creates depth and dimension.
Step 3: Measure Your Lash Line
Measure your natural lash line to ensure your segments are proportionate. You can use a clean toothpick or lightly mark sections where each length will sit.
Step 4: Map Out the Segments

Create a Lash Map
Sketch your lash layout on paper, dividing sections into inner corner, centre, and outer corner.
Practice Placement
Use tweezers to dry-place segments along your lash line before applying adhesive.
Check Balance
Symmetry is key — mirror the same pattern on both eyes for a cohesive look.
Step 5: Apply the Lashes

Follow these steps for flawless application:
Prep Your Natural Lashes
Clean and curl your lashes for optimal adhesion. The Image Square Beauty Lash Foam Cleanser Kit is perfect for removing oils, makeup, and residue.
Apply the Bond
Apply a thin layer of lash bond to the base of your natural lashes and the lash segments.
Place the Segments
Using tweezers, place each segment according to your map, keeping it 1–2mm away from the eyelid. Start from the outer corner and work inward.
Allow to Set
Wait about 5 minutes for the bond to set.
Seal the Lashes
Apply sealant to the underside of the lashes to lock everything in place.
Tips for Perfect Lash Mapping
Practice makes perfect: Your technique will improve with each application.
Watch tutorials: Visual guidance can be incredibly helpful.
Experiment freely: Try different lengths and styles to find your signature look.
Use bond sparingly: Too much can look messy; too little may cause lifting.
Caring for Your DIY Segmented Lashes
Proper care extends the life of your lashes:
Clean gently: Remove makeup and glue carefully. Avoid oil-based removers and rubbing your eyes.
Store properly: Keep lashes in a clean container when not in use.
Limit water exposure: Light humidity is fine but avoid soaking the lashes.
Lash Mapping for Different Eye Shapes

Almond Eyes | Round Eyes | Hooded Eyes | |
|---|---|---|---|
Best Style | All styles | Cat eye | Doll eye |
Mapping Tip | Balanced or cat-eye styles work beautifully | Elongate the eye | Open and lift |
| 8–10mm | 8–10mm | 8–10mm |
| 12–14mm | 10–12mm | 14–16mm |
| 14–16mm | 14–16mm | 12–14mm |
Monolid Eyes | Downturned Eyes | Upturned Eyes | |
|---|---|---|---|
Best Style | Doll eye | Doll eye | Cat eye |
Mapping Tip | Add depth and dimension | Lift outer corners | Focus on natural look |
| 8–10mm | 8–10mm | 8–10mm |
| 14–16mm | 12–14mm | 12–14mm |
| 12–14mm | 14–16mm | 14–16mm |
Universal Tips:
Blend lengths gradually
Always check symmetry
Styling Ideas for Everyday Elegance
Natural Daytime Look

Use shorter, lighter segments (6–10mm) for soft definition. Pair with neutral makeup tones for effortless polish.
Glamorous Evening Style

Opt for longer segments (up to 16mm) and dramatic placement. Winged eyeliner and bold lips elevate the look beautifully.
Your New Lash Adventure Awaits
Mapping your own DIY segmented lashes unlocks endless beauty possibilities. With creativity and practice, you’ll master customised lash looks that suit every mood and occasion.
Whether it’s casual chic or full glam, segmented lashes ensure your eyes always steal the spotlight.
Happy lashing — now go shine! ✨
👉 Explore our stunning segmented lash styles, available as kits or refills.